

Hi Digital Buddy! This time I will share information about how to create and some examples of slider results using Slick Slider in Oxygen Builder.
Even though this article was written for Oxygen Builder, basically you can still use it in other media as long as you can implement the same parts.
For those using Oxygen Builder, any code that needs to be written (not GUI) can use the Code Block element.
All the sliders in this article are made with the Oxygen Builder Gutenberg Block!
Table of Content
- Features of the slick slider
- HTML Structure (DOM) Slick Slider
- Calling Code Slick Slider
- Initiating Slick Slider Code
- Example of Slick Slider Results
- Bonus! Dynamic Slider with Oxygen Builder
- Summary
- Reference
List of Slider In This Article
- Simple slider
- Slider with prev/next button
- Multislide Slider
- Responsive slider
- Slider with autoplay
- Slider with fade effect
- Slider with dots navigation
- Slider with other slider navigation
- Vertical slider
- Dynamic slider in Oxygen Builder
Features of Slick Slider
Slick Slider has many interesting features, some of which are:
Slick Slider has many interesting features, some of which are:
- Fully responsive.
- The scale follows the container.
- Separate settings per breakpoint.
- Use CSS3 if available.
- Can use drag/touch on mobile devices.
- Can use mouse drag on desktop.
- Can repeat infinitely.
- Fully accessible with arrow key navigation.
- Add, remove, filter & unfilter slides.
- Autoplay, dots, arrows, callbacks, etc…
HTML Structure (DOM) Slick Slider
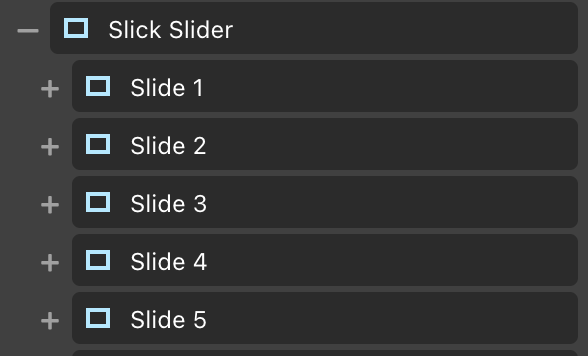
<div class="your_slick_slider_class">
	<div>Slide 1</div>
	<div>Slide 2</div>
	<div>Slide 3</div>
	<div>Slide 4</div>
	<div>Slide 5</div>
</div>
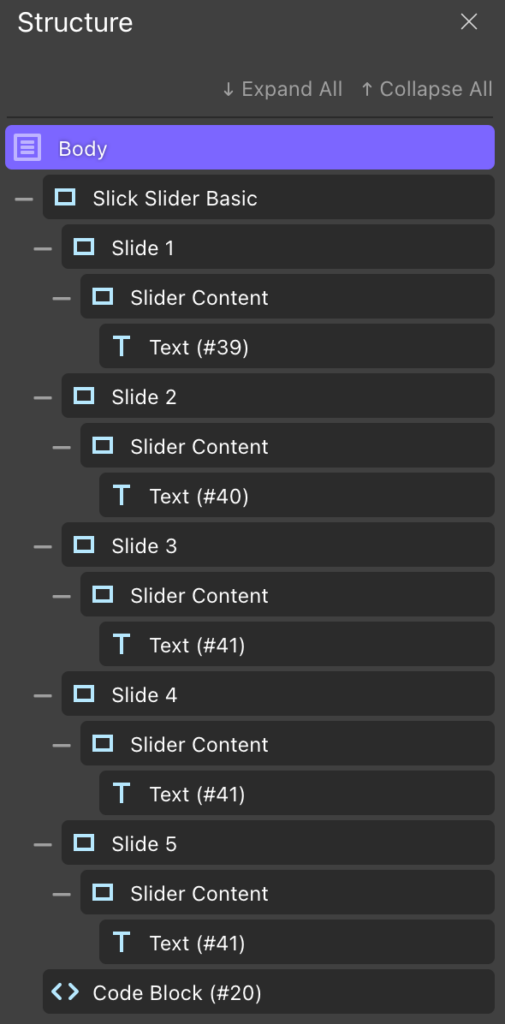
If you use Oxygen Builder, the panel structure will look like this:
Calling Slick Slider Code
So that the html structure that you create later can become a slider, then we need to call the code from Slick Slider first.
<script type="text/javascript" src="//cdn.jsdelivr.net/npm/slick-carousel@1.8.1/slick/slick.min.js"></script>
<link rel="stylesheet" type="text/css" href="//cdn.jsdelivr.net/npm/slick-carousel@1.8.1/slick/slick.css"/>
Initiating Slick Slider Code
After we have called the Slick Slider code, then we can initiate it into the HTML structure that we have created by giving the target according to the class that we have created on the structure. According to the example above, the class is your_slick_slider_class.
jQuery(document).ready(function(){
	jQuery('.your_slick_slider_class').slick();
});
Example of Slick Slider Results
From the example structure and code above, I made some sliders below.
Example of a simple slider result
Note: There may be a slight difference in the results you will get, but all of that can be modified later.
For the structure on the Oxygen Builder panel as below, of course with the addition of the necessary CSS and HTML.
Options on Slick Slider
The Slick Slider developer has prepared many options for modifying the sliders that we have created. The way to add these options is to add javascript code like this:
jQuery('.your_slick_slider_class').slick({
  //options
});
I will try to list some of these options as below:
- slide
Query certain elements that will be used as slides. This option is useful if you also want to add other elements in the slider container but not including the slides, such as arrows, buttons, images, text, etc.
jQuery('.your_slick_slider_class').slick({
  slide:".slick_slide"
});- arrows
This option enables and disables the prev/next button function.
Default : true
jQuery('.your_slick_slider_class').slick({
  slide:".slick_slide",
  arrows:true
});- prevArrow & nextArrow
This option determines the element selector to be used as the prev/next button. For example, I will add 2 icons that function as prev/next buttons.
Example of slider code with Prev/Next Button
jQuery('.slick_slider_basic_arrow').slick({
  slide:".slick_slide",
  arrows:true,
  prevArrow:'.slick_basic_prev',
  nextArrow:'.slick_basic_next'
});
Example of a slider with a prev/next button in the form of an arrow
- infinite
The infinite option is used so that the slider that we create will rotate continuously back to the beginning.
Default : true
- slidesToShow
This option shows how many slides appear in the slider container ( multiple slides ).
Default: 1
Example of a slider code with multiple slides (multislide)
jQuery('.slick_slider').slick({
  slide:'.slick_slide',
  infinite: true,
  arrows:true,
  prevArrow:'.slick_prev',
  nextArrow:'.slick_next',
  slidesToShow:"2",
});
Example of a slider with multiple slides (multislide)

- responsive
This option is to change the slider settings according to a specific device breakpoint.
Example of responsive slider code
jQuery('.slick_slider').slick({
slide:'.slick_slide',
infinite: true,
arrows:true,
prevArrow:'.slick_prev',
nextArrow:'.slick_next',
slidesToShow:"4",
responsive: [
{
breakpoint: 1121,
settings: {
slidesToShow: 3,
}
},
{
breakpoint: 769,
settings: {
slidesToShow: 2,
}
},
{
breakpoint: 481,
settings: {
slidesToShow: 1,
}
}
]
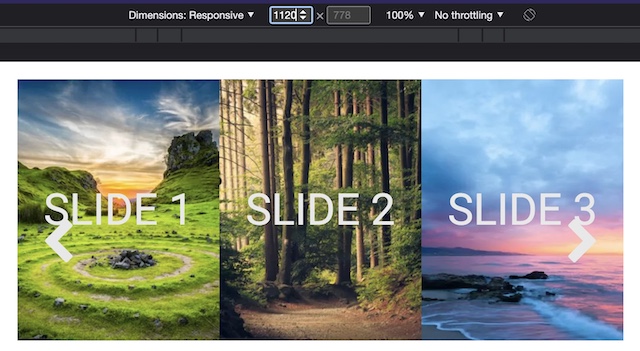
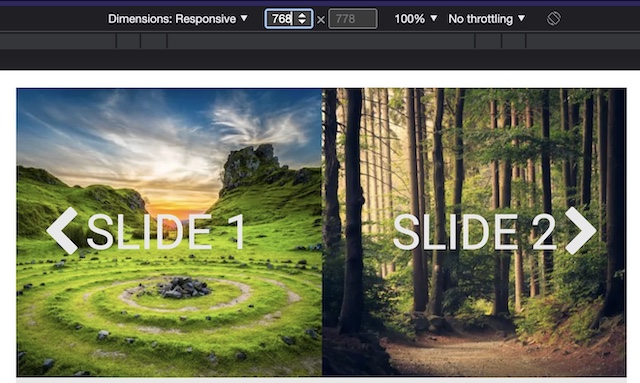
});Examples of responsive slider results
Below is a screenshot of the slider above for some screen resolutions:
- autoplay
This option will make the slider move automatically.
Default: false
- autoplaySpeed
This option is to set the speed at which each slide will move automatically (in milliseconds).
Default:3000
Example of a slider code with autoplay every 2 seconds
jQuery('.slick_slider').slick({
  slide:'.slick_slide',
  infinite: true,
  arrows:true,
  prevArrow:'.slick_prev',
  nextArrow:'.slick_next',
  slidesToShow:"4",
  responsive: [
    {
      breakpoint: 1121,
      settings: {
        slidesToShow: 3,
      }
    },
    {
      breakpoint: 769,
      settings: {
        slidesToShow: 2,
      }
    },
    {
      breakpoint: 481,
      settings: {
        slidesToShow: 1,
      }
    }
  ],
  autoplay:true,
  autoplaySpeed:2000
});
Example of slider results with autoplay every 2 seconds
- fade
This option is to change the slide effect that was shifted to fade.
Default: false
Example of a slider code that uses the fade effect
jQuery('.slick_slider').slick({
  slide:'.slick_slide',
  infinite: true,
  arrows:true,
  prevArrow:'.slick_prev',
  nextArrow:'.slick_next',
  autoplay:true,
  autoplaySpeed:2000,
  fade:true
});
Example of a slider with a fade effect
- lazyLoad
The lazyLoad option is used to delay calling an image asset if it is not already displayed on the screen. This can help improve performance by calling only the assets that are needed.
There are 2 options for lazyLoad, namely ondemand and progressive .
ondemand will call only the image that appears on the screen, and the rest will be called after it appears on the screen.
progressive will call up only the images that appear on the screen, and the rest will be called up after all the assets on the page have been called up (the rest of the slides will still be called up even if they aren't needed).
Default: ondemand
- dots
This option is used to enable dot navigation on the slider.
Default: false
- dotsClass
This option specifies the class to be used on the dot container.
Default: slick-dots
Example of a slider code with navigation dots
jQuery('.slick_slider_dots').slick({
  slide:'.slick_slide_multi',
  infinite: false,
  arrows:false,
  swipe:false,
  fade:true,
  dots:true
});
.slick-dots {
position: absolute;
bottom: 5px;
display: block;
width: 100%;
padding: 0;
margin: 0;
list-style: none;
text-align: center;
}
.slick-dots li {
position: relative;
display: inline-block;
width: 20px;
height: 20px;
margin: 0 5px;
padding: 0;
cursor: pointer;
}
.slick-dots li button {
font-size: 0;
line-height: 0;
display: block;
width: 20px;
height: 20px;
padding: 5px;
cursor: pointer;
color: transparent;
border: 0;
outline: none;
background: transparent;
border-radius: 50px;
border: 2px solid #fefefe;
}
.slick-dots li button:hover {
background:gray;
}
li.slick-active button {
background: white;
}Example of slider results with navigation dots
- focusOnSelect
This option is to activate the focus function on the slide that you select/click.
Default: false
- centerMode
This option is to activate so that the slide you click is positioned in the middle between the slide before and after it. Use with an odd number of slideToShows.
Default: false
- centerPadding
This option specifies how much padding is in px or % when using centerMode.
Default: '50px'
Example of a slider code as navigation on another slider
jQuery('.slick_slider_main').slick({
  slide:'.slick_slide',
  infinite: true,
  arrows:false,
  swipe:false,
  fade:true,
  asNavFor:'.slick_slider_nav'
});

jQuery('.slick_slider_nav').slick({
  slide:'.slick_slide',
  infinite: false,
  arrows:false,
  slidesToShow:5,
  focusOnSelect: true,
  centerMode: false,
  centerPadding:'0',
  asNavFor:'.slick_slider_main',
});
Example of slider results with navigation
- vertical
This option is to change the slide direction from horizontal to vertical.
Default: false
Tips : Disable fade effect.
- verticalSwiping
This option is to activate the sliding function (drag/touch) on the vertical slider.
Default: false
Vertical slider code example
jQuery('.slick_slider_vertical').slick({
  slide:'.slick_slide',
  infinite: false,
  arrows:false,
  verticalSwiping:true,
  fade:false,
  dots:true,
  autoplay:true,
  vertical:true
});
Example of a vertical slider
Bonus! Dynamic Slider with Oxygen Builder
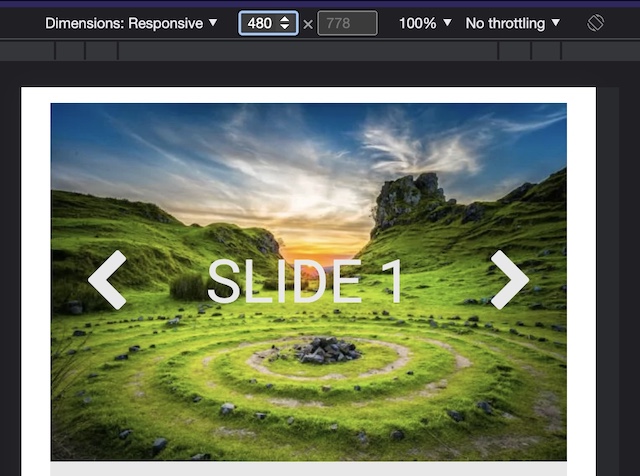
The existence of a repeater function in Oxygen Builder makes it easier for us to create dynamic content. For example, we created a dynamic slider that will bring up the 5 most recent articles that we created.
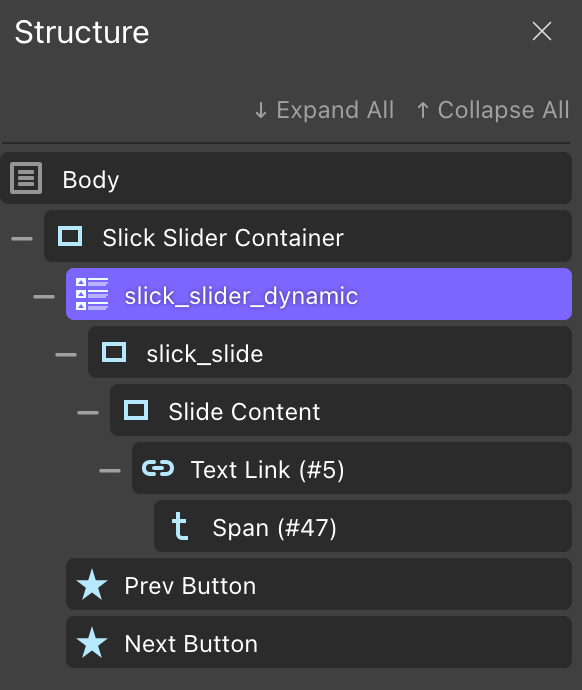
Using the repeater elements from Oxygen Builder to form HTML structures
Example of a custom query on a repeater
post_type=post&category_name=article&posts_per_page=5
Dynamic slider code example
jQuery('.slick_slider_dynamic').slick({
  slide:".slick_slide",
  arrows:true,
  prevArrow:'.slick_dynamic_prev',
  nextArrow:'.slick_dynamic_next'
});
Example of dynamic slider results
Summary
That's the information about 10 Example Slick Sliders in Oxygen Builder & How To Make Them that we can provide, hopefully it can be useful for you.
Of course, the sliders that you can make can be more varied by modifying them as needed. You can look for slider references on the internet for your insight into the various sliders and maybe ideas for creating more interesting sliders with the basics of this tutorial.
What do you think? Can Slick Slider meet the needs of making sliders on your website? Give your comments and feedback in the comments column below.
Happy digitalize your life!
Reference:
- Slick Slider
- Photos taken from Unsplash with the keyword "nature"
- Oxygen Builder